2D图像的三维重建是从一组2D图像中创建对象或场景的三维模型的过程。这个技术广泛应用于计算机视觉、机器人技术和虚拟现实等领域。
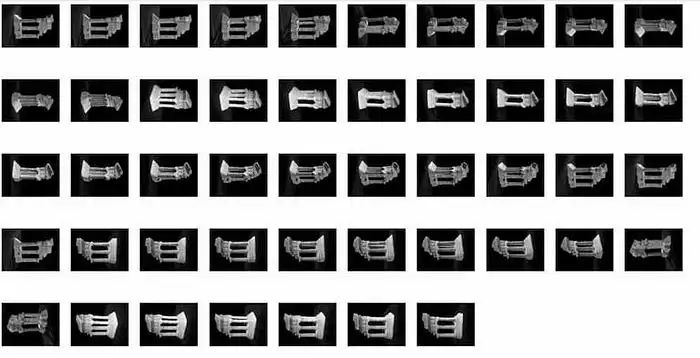
在本文中,我们将解释如何使用Python执行从2D图像到三维重建的过程。我们将使用TempleRing数据集作为示例,逐步演示这个过程。该数据集包含了在对象周围的一个环上采样的阿格里真托(Agrigento)“Dioskouroi神庙”复制品的47个视图。
三维重建的关键概念
在深入了解如何使用Python从2D图像执行三维重建的详细步骤之前,让我们首先回顾一些与这个主题相关的关键概念。
深度图
深度图是一幅图像,其中每个像素代表摄像机和场景中相应点之间的距离。深度图常用于计算机视觉和机器人技术中,用于表示场景的三维结构。
有许多不同的方法可以从2D图像计算深度图,包括立体对应、结构光和飞行时间等。在本文中,我们将使用立体对应来从示例数据集计算深度图。
Point Cloud
点云是表示对象或场景形状的三维空间中的一组点。点云常用于计算机视觉和机器人技术中,用于表示场景的三维结构。
一旦我们计算出代表场景深度的深度图,我们可以使用它来计算一个三维点云。这涉及使用有关摄像机内部和外部参数的信息,将深度图中的每个像素投影回三维空间。
网格
网格是一个由顶点、边和面连接而成的表面表示。网格常用于计算机图形学和虚拟现实中,用于表示对象或场景的形状。
一旦我们计算出代表对象或场景形状的三维点云,我们可以使用它来生成一个网格。这涉及使用诸如Marching Cubes或Poisson表面重建等算法,将表面拟合到点云上。
逐步实现
现在我们已经回顾了与2D图像的三维重建相关的一些关键概念,让我们看看如何使用Python执行这个过程。我们将使用TempleRing数据集作为示例,逐步演示这个过程。下面是一个执行Temple Ring数据集中图像的三维重建的示例代码:
安装库:
pip install numpy scipy
导入库:
#importing libraries
import cv2
import numpy as np
import matplotlib.pyplot as plt
import os
加载TempleRing数据集的图像:
# Directory containing the dataset images
dataset_dir = '/content/drive/MyDrive/templeRing'
# Initialize the list to store images
images = []
# Attempt to load the grayscale images and store them in the list
for i in range(1, 48): # Assuming images are named templeR0001.png to templeR0047.png
img_path = os.path.join(dataset_dir, f'templeR{i:04d}.png')
img = cv2.imread(img_path, cv2.IMREAD_GRAYSCALE)
if img is not None:
images.append(img)
else:
print(f"Warning: Unable to load 'templeR{i:04d}.png'")
# Visualize the input images
num_rows = 5 # Specify the number of rows
num_cols = 10 # Specify the number of columns
fig, axs = plt.subplots(num_rows, num_cols, figsize=(15, 8))
# Loop through the images and display them
for i, img in enumerate(images):
row_index = i // num_cols # Calculate the row index for the subplot
col_index = i % num_cols # Calculate the column index for the subplot
axs[row_index, col_index].imshow(img, cmap='gray')
axs[row_index, col_index].axis('off')
# Fill any remaining empty subplots with a white background
for i in range(len(images), num_rows * num_cols):
row_index = i // num_cols
col_index = i % num_cols
axs[row_index, col_index].axis('off')
plt.show()

解释:这段代码加载灰度图像序列,将它们排列在网格布局中,并使用matplotlib显示它们。
为每个图像计算深度图:
# Directory containing the dataset images
dataset_dir = '/content/drive/MyDrive/templeRing'
# Initialize the list to store images
images = []
# Attempt to load the grayscale images and store them in the list
for i in range(1, 48): # Assuming images are named templeR0001.png to templeR0047.png
img_path = os.path.join(dataset_dir, f'templeR{i:04d}.png')
img = cv2.imread(img_path, cv2.IMREAD_GRAYSCALE)
if img is not None:
images.append(img)
else:
print(f"Warning: Unable to load 'templeR{i:04d}.png'")
# Initialize the list to store depth maps
depth_maps = []
# Create a StereoBM object with your preferred parameters
stereo = cv2.StereoBM_create(numDisparities=16, blockSize=15)
# Loop through the images to calculate depth maps
for img in images:
# Compute the depth map
disparity = stereo.compute(img, img)
# Normalize the disparity map for visualization
disparity_normalized = cv2.normalize(
disparity, None, 0, 255, cv2.NORM_MINMAX, cv2.CV_8U)
# Append the normalized disparity map to the list of depth maps
depth_maps.append(disparity_normalized)
# Visualize all the depth maps
num_rows = 5 # Specify the number of rows
num_cols = 10 # Specify the number of columns
fig, axs = plt.subplots(num_rows, num_cols, figsize=(15, 8))
for i, depth_map in enumerate(depth_maps):
row_index = i // num_cols # Calculate the row index for the subplot
col_index = i % num_cols # Calculate the column index for the subplot
axs[row_index, col_index].imshow(depth_map, cmap='jet')
axs[row_index, col_index].axis('off')
# Fill any remaining empty subplots with a white background
for i in range(len(depth_maps), num_rows * num_cols):
row_index = i // num_cols
col_index = i % num_cols
axs[row_index, col_index].axis('off')
plt.show()
解释:这段代码负责使用Stereo Block Matching(StereoBM)算法从一系列立体图像中计算深度图。它遍历灰度立体图像列表,并为每一对相邻图像计算深度图。
